An Amp Plaque
Sometimes things don’t come together quickly – they just sort of stay on a back burner for a while, and then one day a light comes on and finally you’re off and running. That’s sort of what happened with this little project. A friend Jim, had asked me some time ago if I could scrollsaw him a “TRAMP” sign for his amp. Jim’s a fine guitarist and he always manages to get the best sound out of his equipment. Mind you it’s not just the equipment; his playing skills are right up there too.
Anyways, it took a while, but finally one day I started playing around with fonts on my computer and came up with a couple that I thought he’d like. The first was the Cotillion font, which looks quite fancy (some would say flowery), and most of the letters are connected to one another. The second font was the SignPainters-House font, which is a little less fancy and to my mind a lot easier to cut out of pearl.
The connection part is important, because it’s far easier to inly the letters in a straight horizontal. or slanted, line if the letters are connected. Most fonts do not connect any of the letters – they pretty well stand alone. In the case of these two “connected” fonts, the upper case letters, or upper case to lower case letters are not connected, but at least the lower case to lower case letters are.
I realized fairly quickly that I might be able to fit most of the “TRAMP” onto a pearl blank as opposed to having to scrollsaw a set of letters out of thin wood. The “T” would be a separate piece of pearl and the “ramp” could be cut from another, separate piece. So I sent him a word document showing the two fonts, sized as large as I thought feasible for pearl blanks, and asked for his preference. To my relief he chose the SignPainters-House font at a size of 72 points – large.
Here are a few photos of the process. First the pearl “Tramp”:

“Tramp” cut from Pearl – SignPainters-House font.
Next I traced the pearl onto some pieces of rosewood, and practiced routing:
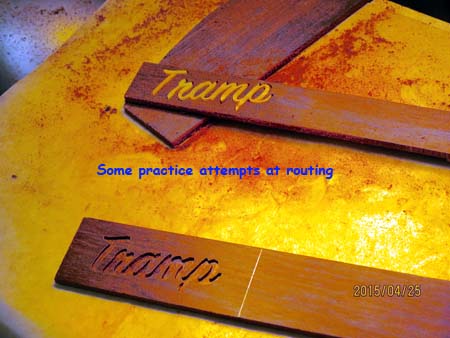
A few practice attempts at routing
Here’s the first attempt at inlaying the pearl.
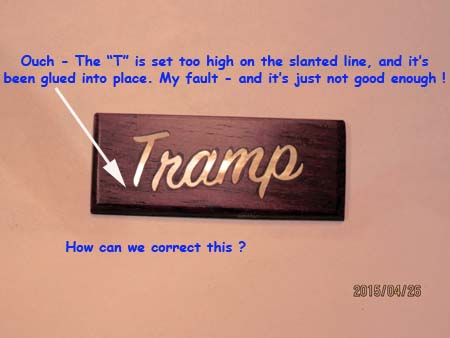
A problem surfaces.
Okay, I goofed, and on top of that I even epoxied the mistake into place. So now I have to fix it. Removing pearl can be done, but constant routing of pearl can cause the router bit to heat up to the point of ruining it. First you have to puncture the pearl in many locations so that the pearl can be removed easily without ruining the edges of the cavity. Not hard, but who knew ? Now you do.
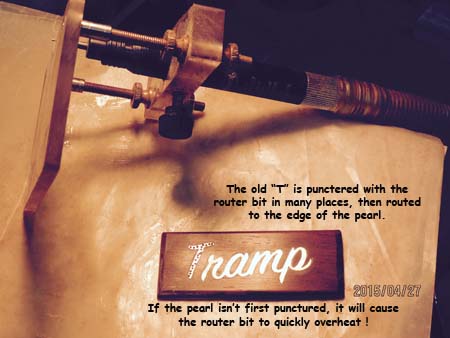
Removing the old “T”.
Next I cut a new “T” with an elongated stem, having carefully measured the required height of the letter. Then I fitted it into the top of the cavity, filing it as necessary until all but the elongated portion slotted into place. Then I traced the elongated portion onto the wood and routed out the additional space. When it all fit nicely, I re-epoxied the letter into the wood, and did the finish sanding and polishing. Here’s the finished plaque:
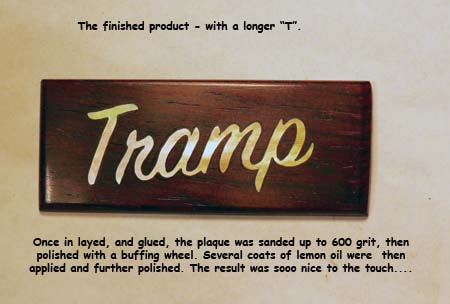
Finished Plaque
Once I’d finished the plaque I notified Jim that it was ready. Jim, who lives some distance away, said he’d pick it up when he came down for our once a month gig. To be honest, the little plaque felt so good in my fingers that I really didn’t want to part with it – it was very pleasant to hold and touch with my fingers; smooth enough to be almost slippery. But finally he did visit, and took it back with him to attach to the amplifier that it was intended to enhance. Here’s a picture of it siliconed onto the speaker grill of one of his amplifiers.
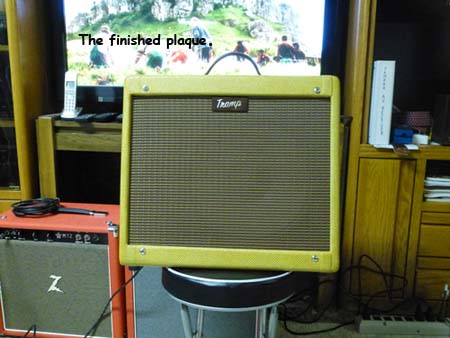
The plaque – siliconed onto the speaker grill